This Giveaway is now closed. Read on to find out how to make one for yourself! :)
I am so excited for this post! This week I am celebrating my one year blogiversary! Yippee! What better way to celebrate than with a cute tutorial and giveaway!
One of my little girls has a very wiggly tooth right now. By wiggly I mean I can’t believe that sucker is still hanging in there! I have been planning to make them tooth fairy pillows and have had the fabric for ages but now I need to get on it pronto.


So, do you want to learn how to make one of these? Even better, read all the way through this post to find out how you could win one!
Here we go: Tooth Fairy Pillow Tutorial
Materials:
Scraps of fabric. (Your finished pillow will measure approx. 9” X 7” so you don’t need much.)
12’’ of 7/8” Wide Ribbon
Poly-fil
Thread, Scissors, Sewing Machine, Etc.
Optional Materials:
RicRac
Tooth Fairy Image
Printable Fabric
Printer
Wonder Under
Rotary Cutter and Cutting Mat
Making Your Pattern and Cutting:

Draw a 9” x 7” rectangle and divide it into whatever sections you would like. This is up to you how you would like to divide it.
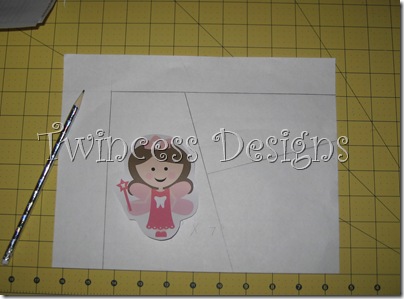
I found a cute tooth fairy picture that I wanted to use so I made sure that it would fit in one of the sections.
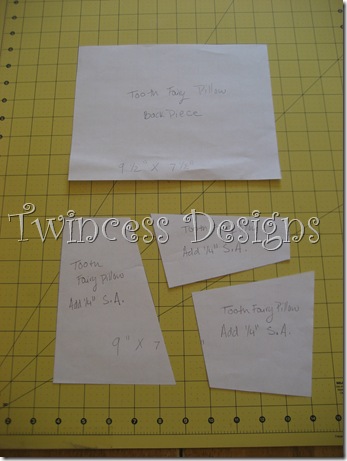
Cut your sections apart and draw an additional rectangle that is 9 1/2” x 7 1/2”. This will be your template for the back of the pillow and the extra half an inch is for seam allowances.

Now you will also need to add seam allowances to all of the sides of your front pieces. You can either redraw your pattern with an extra 1/4” on all sides or just remember to cut it with the extra seam allowance. I wrote myself a note on the front of each piece to remind me to cut the extra seam allowance. The writing on the front will also help me keep the pattern pieces facing right side up.
In addition to these fabric pieces, you will need a 4” x 8” piece of fabric for the back pocket.
Embellishments:

As I mentioned above, I wanted to include this cute tooth fairy image in my design. I used Photo Fabric for the first time. I set my printer for “best” printing and then just followed the directions on the package. I found my Photo Fabric at Joann’s. It can be pricey so remember to bring a coupon. Also be sure to fill up your page with other items you might want to use so that you don’t waist any.
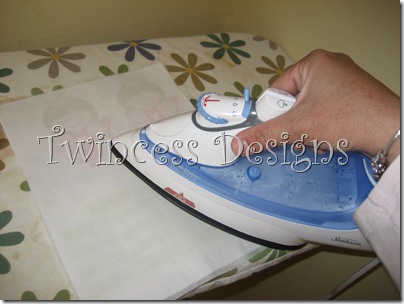
You will notice in the picture above that I had planned to use Wonder Under to help keep my tooth fairy image in place while I appliquéd it. I ironed it on the back but ended up not using it.
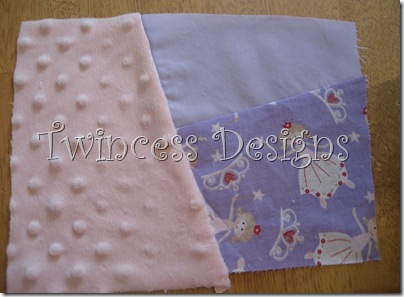
Here is why. See the cute little bumps in this minky fabric? See how they aren’t as visible in the lower right hand section? Well duh, they ironed right out when I pressed them. If you are using a regular fabric like cotton, go ahead and use the wonder under and then sew down your appliqué.

O.K. so here is a picture and list of everything you should need before you start sewing.
Fabric pieces for front of pillow
9 1/2” x 7 1/2” piece of fabric for the back of the pillow
4” X 8” piece of fabric for back pocket
7/8” wide Ribbon
Tooth fairy image (optional)
Medium ricrac (optional)
Sewing:
Use a 1/4” seam allowance.

Sew your two smaller front pieces together right sides facing and then press open.

Lay a piece of ricrac on top of this seam and sew down. The piece of ricrac should be just a bit longer then the fabric pieces.
Lay your larger section on top right sides together, sew, and press open. (If you are using minky DO NOT iron!)

This is what you should have so far.

Cut our your tooth fairy image and sew down. I just used a straight stitch around the edges. You could also use a zigzag stitch if you don’t want your image to fray at all.

O.K. you should now have something like this. Your front piece is done! Yippee!


Now take your 4” x 8” fabric piece for your pocket. Lay it on your
ugly scorched ironing board and fold it in half right sides together and press. You should have a 4” x4” square.

Sew down both sides leaving the bottom open for turning.

Turn the pocket right side out and press. I like to use a chopstick to really poke out my corners.

If you would like, place a piece of ricrac at the top (that’s the folded edge) of the square and sew down. Again, the piece of ricrac should be a bit longer than the fabric piece.

Lay your pocket where you would like it but do NOT sew down yet.

Flip the pocket down so that the wrong side is up.

Sew along this bottom edge. This will also close up the opening in the bottom of the pocket piece.
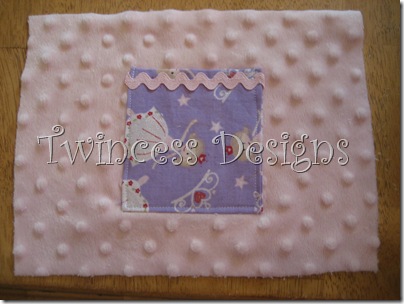
Flip the pocket back up and top stitch down one side, across the bottom, and up the other side. Two important things to remember: 1. Tuck the ricrac ends under the pocket piece. 2. As you sew around the edges, lower your needle at the corners, raise your pressure foot, pivot your fabric, lower the pressure foot and keep sewing.
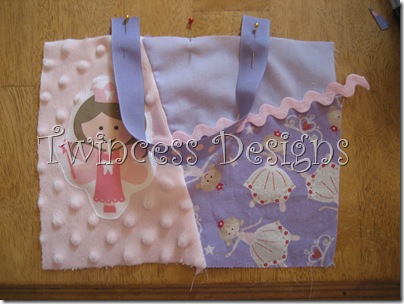
Take your front piece and fold it in half to determine the midpoint. See that red pin? That is my mid point. Then I just eyeballed it and attached my ribbon to either side. I used 12” of 7/8” wide ribbon. If your ribbon has printing on it like mine, you want the printing facing down.

Lay your back rectangle piece on top with right sides facing and pin.

Sew all the way around your pillow and remember to pivot at the corners just like you did with your pocket piece. Important: Leave about a 3” opening in the bottom for turning.

See my opening?

Clip the corners making sure not to cut through the stitching and then turn your pillow right side out. Don’t forget to use your trusty chopstick to poke out those corners.
Stuff your pillow with Poly Fil. I like to use small pieces as this tends to give you a less lumpy pillow.
Hand sew the opening closed.

You’re done!
If you would like you could put your child’s name on the pillow too. Of course you would want to add this to the front piece before you sew the pillow together. You could embroider your child’s name, cut a freezer paper stencil and paint your child’s name, or cut some heat transfer and iron it on.
This giveaway is now closed.
GIVEAWAY!!!!
Would you like to win one of these cute pillows? In honor of my blogiversary I am making one to give away and it could be yours! I will make it after we have a winner so that I can put your child’s name on it if you would like.
Here are the rules:
1. You must be a follower of Twincess Designs to enter. If you aren’t already it is easy to sign up.
2. Leave a Comment. That’s it! Easy Peasy!
3. Only one entry per person please. Make sure that I have a way to contact you if you win. Your e-mail either needs to be in your comment or on your profile page. Thanks!
This giveaway will close at 9:00 p.m EST on Saturday, May 14 !
The winner will be announced on Sunday, May 15.
Good Luck!


